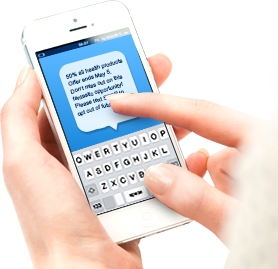
SMS Gateway By Direct SMS
- Powerful features, yet simple to use.
- Dedicated local support via email, live chat and phone.


What Our Clients Say
View All Case Studies"High level of service and very responsive with our support queries"
directSMS' customer service team have provided a high level of service and have been very responsive with all our support queries.

"Very efficient customer service - always quick replies and very helpful"
directSMS customer service is very efficient. Whenever I have had to ask questions, I always got quick replies and they were very helpful.

"Very quick to respond - and provided us with the solution we required"
directSMS are really easy to deal with, very quick to respond and were able to provide us with the flexible solution we required. I would definitely recommend them to anyone.

"directSMS' service and support is second to none"
NABS depends heavily on directSMS' technology to communicate with our deaf consumers & other parties. directSMS have provide a reliable & flexible solution that has become integral to the operations of the NABS call centre team. Their customer service and support is second to none.

"Extremely reliable and easy to use - we've increased productivity"
At Bess Concrete we have found directSMS to be an extremely reliable and easy to use service. By introducing this program to our business we have been able to increase productivity within the office. Thank you.

"Prompt with service - and you'll always have the right knowledge and tools"
I have found it extremely beneficial using directSMS. They are prompt with their service and pay particular attention to detail to ensure the customer always has the right knowledge and tools available, I would highly recommend using directSMS for your marketing platform.

"A great tool - it helps me do my job faster!"
The Web 2 SMS service is a great work tool. It helps us save time and our customers think it's great and very handy given that they are always on the move. It helps me do my job faster thanks directSMS!

Helped us when no other provider could
directSMS dug us out of a precarious hole when no other provider was contactable. After frantically contacting numerous service providers both in Australia and off-shore, directSMS responded to our message for assistance swiftly, and made it very easy to get our communications up and running. Their customer service and support was outstanding. I’m an advocate!

A very easy system to advise our key stakeholders
The Karratha SES have been utilising directSMS for some 2+ years and have found it has assisted us greatly in a number of areas. This has given us a very easy system by which we can advise our key stakeholders and members. Everything you want is in the one tool, reporting, clear indicators that identify any issues with the SMS not being sent out. I highly recommend this tool as there are many out there but directSMS has met all of my requirements.

Helps me do my job faster
The Web 2 SMS service is a great work tool. It helps us save time and our customers think it's great and very handy given that they are always on the move. It helps me do my job faster thanks directSMS!
The flexible solution we needed
directSMS are really easy to deal with, very quick to respond and were able to provide us with the flexible solution we required. I would definitely recommend them to anyone
High service and very responsive
'directSMS' customer service team have provided a high level of service and have been very responsive with all our support queries.